Contents
- A few powerful features
- Agent is in beta
- Sign in and out
- View and search your contact list
- Toolbar and info bar
- Add or import new contacts
- Email or call a contact
- View and edit a contact’s details
- Keep agendas for your contacts
- Create and track Outreach Projects
- Tags and notes
- Group actions
- Meeting histories
- Report a bug
A few powerful features
Agent was built to give the simple address book some of the powerful tools that communications professionals use.
Key features are:
- Agendas
- Meeting Histories
- Outreach Projects
The goal is to help your address book know who you need to contact about what.
Agent is in beta
This guide explains how Agent works in its current form. Nonetheless, features may not work as expected and errors may occur.
The guide will be updated as Agent improves, but it may not always be current.
Sign in and out

Tap or click the user account icon to sign in.
The icon is orange while you are signed in. Tap or click it from anywhere in the site to see the user account menu.

When you choose “Sign out” from the menu, the icon will turn white again.
View and search your contact list
When you sign in, you will see all your contacts in a simple list.

Use a contact’s email and call buttons to send an email or start a call. Tap or click a contact’s name to view and edit their full information.
Use the toolbar at the top of the list to sort and search your contacts or to filter your contacts using Agent’s unique features: Agendas, Histories, and Outreach.
Toolbar and info bar

Contacts with agendas: Tap or click the clipboard icon to see only those contact for whom you have agenda items. This is a quick way to get your “call list” at the start of the day.
Contacts in Outreach Projects: Tap or click the bullhorn icon to filter your contacts by Outreach Project and Stage (see Create and track Outreach Projects).
Contacts with meeting histories: Tap or click the calendar icon to filter your contacts by when and how you’ve interacted with them (see Meeting histories).
Quick search: Use the “Quick search” field to find contacts that match your search text in any of the key fields: name, title, organization, agenda items, meeting notes, tags, etc.
Sort: Tap or click the sort icon to reorder your contacts by first or lastname, company, city, and more.
Just below the toolbar is the info bar.

When you search or filter your contacts, the info bar summarizes the results of your current search.
At the end of the info bar is an action button. Tap it to open the Group Actions menu (see Group actions).
Add or import new contacts
Add a contact: Tap or click the contact-plus icon in the Toolbar to open a blank record for a new contact. Fill in some details and click the “New” button to save it.
Import contacts: When you create a new contact, you can also click the file upload icon to import a vCard for a single contact or a vCard file (.VCF) that contains an entire address book.
Export contacts from another address book: To move your contacts from your Google, Apple, Outlook or other account or address book, first export your contacts to a vCard. See Importing Contacts for help.
Email or call a contact
The panel for a contact lets you start an email or phone call.

Start an email: Tap or click the envelope icon.
A pop-up will show you the contact’s default email address, allow you to see the agenda items you have for this person, and offer to add this email message to your history with that contact.
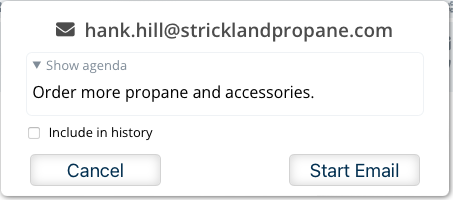
If you check “Include in history,” you can add a topic or note for this message in the history log.
Tap or click “Start Email,” and your email app will open a new message addressed to this contact with your topic or note in the “Subject” field.
Start a voice call: Tap or click the telephone icon.
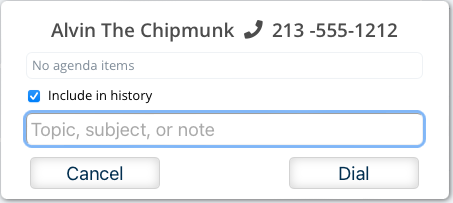
The contact‘s default phone number will be shown, along with your agenda items for him or her and a checkbox for adding this call to your history. Click “Dial” to start the call.
View and edit a contact’s details
From your list of contacts, tap or click a contact’s name to view and edit their details.
At the top are buttons to start an email or call and a button to return to the list.
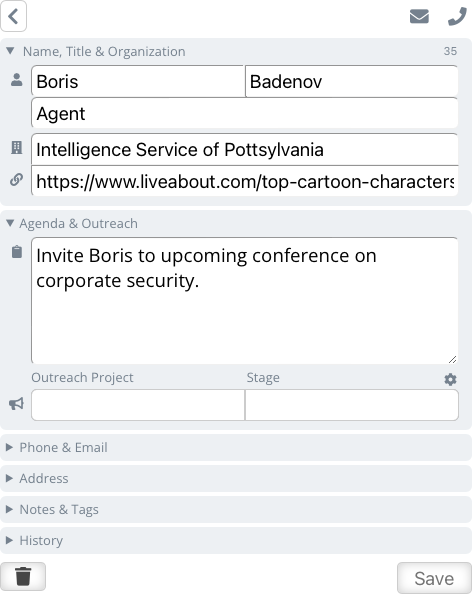
A contact’s information is arranged in panels that you can expand or collapse by clicking the panel’s name.
When you are finished updating a contact, tap or click the “Save” button.
Keep agendas for your contacts
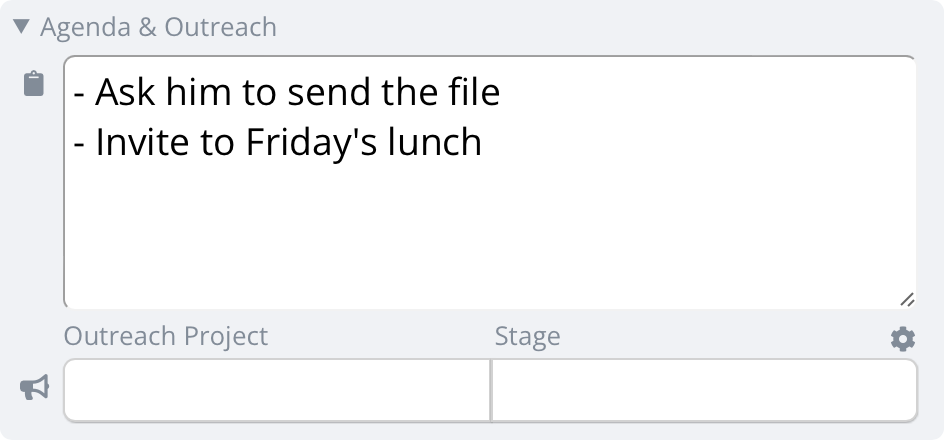
Use the Agenda field to record questions, discussion items, and topics you want to bring up with this contact. When you next talk, consult the agenda for a reminder of what to mention.
In list view, the clipboard icon in the toolbar finds every contact with an agenda.
Use this as an always up to date “call list” for when you find yourself stuck in traffic, waiting for an online meeting to start, or at other unproductive moments.
Avoid putting general information such as the name of the contact’s spouse or their birthday in the Agenda field. Use the Notes field to keep this information separate.
Create and track Outreach Projects

Use the drop-down menu to choose an Outreach Project for your contact, then assign them to a stage in that outreach activity.
Let me explain.
Most CRMs have a function to help businesses manage their sales pipeline. The pipeline is the series of steps that a customer moves through, from potential sale to satisfied customer.
Typical pipeline stages are:
- 1. raw lead
- 2. qualified lead
- 3. potential sale
- 4. in negotation
- 5. completed sale
The job of a sales team is to move customers through these stages, and there are specific messages they send at each step.
Not all relationships, however, are about sales.
If you’re job is media relations, you may be pitching a story to journalists, or if you are a recruiter, you may be trying to attract new employees. Or maybe you just need to touch base with all your team members this month and want an easy way to track who's been contacted, who's been scheduled, and who you've met.
Agent lets you create your own “pipelines” for any kind of outreach activity, helping you keep track of the next steps to take with your contacts. Use it to update a guest list for an event, or as a simple and convenient CRM for your small business.
Tap the gear icon to manage your Outreach Projects. Add, delete or rename the stages of an Outreach Project.
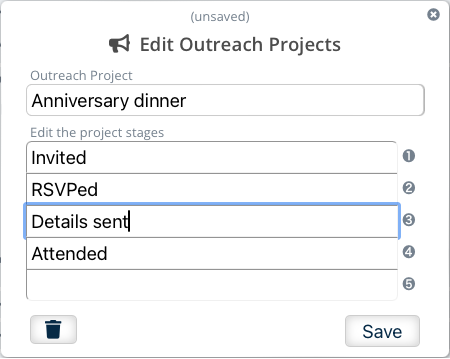
To create a new Outreach Project, click the field for the Outreach Project name and choose “New Outreach Project” from the pop-up menu. Type a name for your Outreach Project and add up to 5 stages. Tap or click “Create” when you’re done.
In list view, use the bullhorn icon to filter your contacts by Outreach Project and Stage.
Quickly see everyone who should receive the introductory sales offer. Or everyone who RSVPed and needs directions to the anniversary dinner.
Avoid using Outreach and Stages to classify your contacts into groups and subgroups. (That’s just busy work.) Use the Tags field for this instead.
Tags and notes

Put keywords, topics, and other identifiers in the Tag field, separated by spaces or commas. Then use the Quick Search to find all contacts that share the same tag.
To search by tags more effectively, start every tag with a hash character (#). For example, “#investor” will let you find every contact with that tag without also finding contacts with the word “investor” in another field.
Group actions
Group actions let you quickly act on all the contacts in your current search results.
No need to create and maintain mailing lists and separate contact groups; just filter for a certain tag, outreach project, or any criteria; then choose an action.
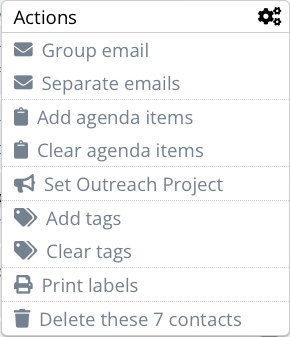
In list view, tap or click the actions button in the info bar to see actions you can take with the current list of contacts: send emails, update your agenda items for these contacts, add or change their tags, etc.
Combine Group Actions with Outreach Projects and Agendas to be extra productive.
Filter your contacts to see only those at a certain stage in one Outreach Project—all the journalist who received the press release, for example. Then easily update the agenda for all of them—“Pitch them on the story.”
Now they will be included when you next generate your “call list,” and when you contact them, you will be reminded what you need to say.
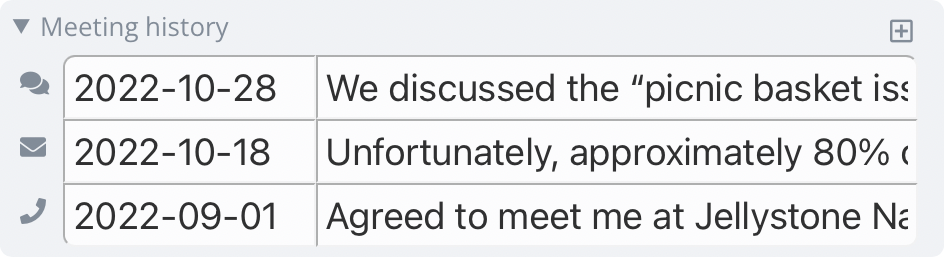
Meeting histories
Agent helps you track your meetings and conversations.
Tap or click the plus icon to add a meeting to a contact’s meeting history.
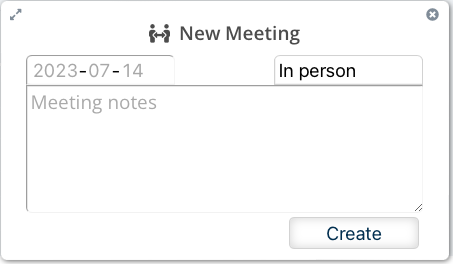
Pick the date and then select the type of meeting from the pull-down list:
- In person
- By video
- By phone
- By email
- By chat
You can include notes about the meeting—what was discussed, tasks assigned, the meeting outcome, etc. Tap or click “Create” when you are done.
When you start an email or phone call, Agent can add it to the meeting history automatically. See Email or call a contact.
The details of any meeting can be changed by tapping or clicking its row in the log.